| Columns Retired Columns & Blogs |
Listening #43
In his June, 2006 "Listening" column, Art Dudley discussed the original Quad ESL loudspeaker, and started to describe the task of refurbishing a 47-year-old pair of them; this month, Art fries a pair of transformers and nearly ruins his new wall oven—but finishes the job nevertheless. Please remember that sharp tools, solder flux fumes, and the high voltages typically present inside an electrostatic loudspeaker can sicken or kill you if you don't proceed with caution, and neither Stereophile nor its parent company, Primedia, can be responsible for the suffering or loss that may befall readers who follow Art's advice. Thank you.

Nip. Tuck. Exfoliate. Repeat.
On the day my daughter was born, as afternoon turned to evening and my wife drifted in and out of sleep after a very long labor, I left the hospital to have some dinner and get some sleep of my own. Home was 40 minutes away, and as I walked through the door, the phone was ringing: It was Janet, calling to say that she and Baby Girl Dudley were resting comfortably. Then, before we said our goodbyes, I heard a sound that will stay with me until my last day on Earth: the sound of my newborn daughter cooing, which was the sweetest thing ever. Remarkably or not, I heard some quality in her voice that I continue to recognize in every word my daughter has spoken to me in the days since. In that sense, the good lord God has given me cause to smile many times a day, for reasons that are generally unapparent to everyone else. Which is to say: Life is good.
*******
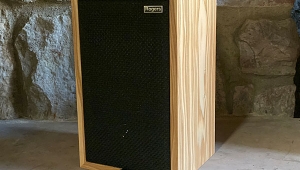
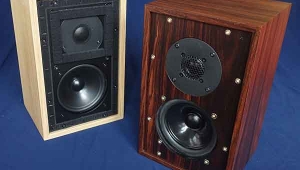
Let's say you found an old pair of Quad ESL loudspeakers on eBay, and you're refurbishing them yourself. In fact, let's say you're me—in which case, you have a number of old dirty parts laid out on your workbench, including four electrostatic bass panels. Let's focus on those first of all.
Regardless of their vintage, you'll want to replace the dustcovers. It isn't hard to do, but you should nevertheless tackle the first of the four slowly and deliberately, so you can understand how they go together. Each Quad panel is a sandwich, with a conductive diaphragm held between a pair of coated plastic stators, which are themselves held tightly together with clear poly tape (by now no doubt yellowed). That three-layer sandwich is then held between a pair of slender wooden frames, one in front and one behind, the outer surfaces of which are covered with 8µm polyethylene film. The whole shebang is held together at its perimeter by 2"-wide PVC tape.

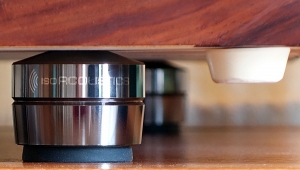
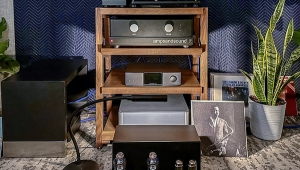
Use a light touch and a clean soldering iron tip on that new dustcover.
The idea is to remove the outer layer of tape while leaving intact the inner layer that holds the stators together. (Again: These panels contain significant voltages, and to break or disturb the tape that insulates the stators from the rest of the world is to compromise performance and safety alike.) Find the end of the outside piece of tape and lift it away with a hobbyist's knife; then, once you're certain which layer of tape is which, you can move along more smartly, lifting, slicing, and scraping as you go. Set the stator/diaphragm sandwich off to one side (preferably in a clean place without direct sunlight) and remove the phenolic terminal board from the rear frame. If you want to clean the terminals—strongly recommended—you can unscrew each one from the board and use some desoldering braid and a pair of needle-nose pliers to remove all traces of the old wire and solder. Re-tin as necessary and refasten to the phenolic board.
The frames themselves won't be so easy; you'll need cunning and elbow grease in equal measure. Scrape away the worst of the old film and glue with a razor blade or, better yet, a proper cabinet scraper, then use sandpaper on a rigid block to clear away the rest of the schmutz, right down to the bare wood. Sand to at least 150 grit or finer, then use a vacuum cleaner and a tack cloth to remove every last bit of dust.

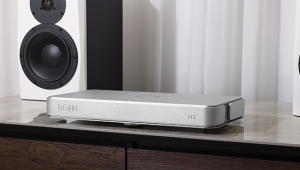
Then pull the wires gently through and realign the front and rear dustcover frames with the stator/diaphragm assembly.
Applying new film is easy—not so finding the stuff in the first place. Master restorer Wayne Picquet shared some of his stash with me, one alternative to which would have been buying it in a crazy-large quantity from a company that sells packaging and shipping supplies. (If you don't mind buying a 4375' roll, try www.associatedbag.com.) In any event, you want 60-gauge polyolefin shrink film, at least 14" wide.
Clean your work table thoroughly, and cut a piece of film large enough to do one frame, smoothing out the wrinkles as best you can and taping down the edges to keep it flat. Then apply a single, smooth layer of ½"-wide double-sided tape to the face of the frame (to do four bass panels you'll need two or three 250" rolls, available at any photo store for about $2 each), and press the frame down against the film. Make sure you have a blade or some other tool handy to cut the wood away from the excess film at once: If the frame has been in use long enough to retain its curved profile, a portion of it can tear away from the film before the adhesive has a chance to do its job. Apply firm pressure to smooth out the wrinkles, and neatly trim the edges. Repeat thricely.
Before you put the frames back together with the stators, examine the latter carefully for signs of damage. (The electrical connections on mine appeared weak—and probably had been since 1959—so I replaced the wires, taking care to apply only as much heat as needed to loosen the solder. Using a heatsink on the connecting tabs would also be a good idea.) Reinstall the phenolic terminal boards on the rear frame, then use your soldering iron to burn three holes in the film on each rear dustcover, for the wires to pass through: Making the holes with a punch won't do; the film splits over time if not cauterized.

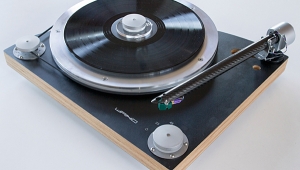
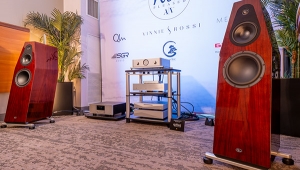
Taping the reworked panels back together.
Now sandwich the stator assembly between the front and rear dustcovers, gently snaking the wires through the openings you made in the latter, and tape them together with 2" clear poly tape. Work slowly and carefully, and get someone to hold the pieces tightly together while you tape them, if necessary. Don't leave any gaps—but don't get sloppy with the tape, either, or else the panels will look crappy, and may not even fit properly during final reassembly.
Some success & a disaster
With the bass panels done and the treble panels seen to by an expert, three subprojects remain: the transformer, the high-tension unit, and the enclosure itself.
The last is the easiest: Clean it, look for cracks, tighten the screws, sand it to 220 grit, and paint the sucker. I used Rust-Oleum semigloss black, with wonderful results. You'd think it was 1959 all over again.
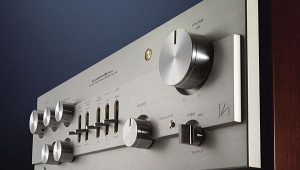
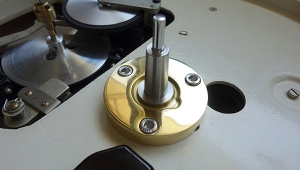
The high-tension (HT) units are more daunting but still quite doable. Look closely and you'll see two wires—one hot, one ground—leading from the secondary of the mains transformer to the block of resin just above it. Note which is which, clip them off at the trannie, and replace them with 5" lengths of any decent hookup wire rated for 600V or more. Remove the resin block altogether—it's bolted to the brass frame of the HT unit—and replace it with the modern diode bridge of your choice. Virtually all Quad rebuild experts offer bridges that are well made and reasonably priced. Twist the aforementioned wires together, strip and tin the ends, and solder them to the appropriate points on the new board, which will probably be marked "600V" and "EARTH." Take a moment to find and repair any faults in the wiring to the AC socket: That's easy to do now, with the HT unit freed from its enclosure.
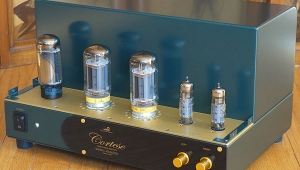
Last come the transformer units, which are more fragile than they look. Each of these three-quart cans is almost completely filled with beeswax, potting the core and windings and occasionally overflowing the phenolic tag board at the bottom, which holds the crossover parts. My 1959 ESLs predated the Quad factory modification that made the speakers' dispersion more suited for stereo (among other things); for that reason, and because I'm more of an audio geek than I sometimes admit to, I wanted to replace the original capacitors and resistors with modern equivalents. So I heated up my desoldering tool—the kind with the vaguely obscene-looking rubber bulb—and set to work stripping all the terminal posts to the bare metal.
Very bad idea. The finished job looked nice enough, but when I used my digital multitester to check that all the resistances were right, I found a shorted coil on one speaker's trannie and two on the other.
Panic ensued, appropriately. With the guidance of Wayne Picquet and the indulgence of my wife, I used a discarded pot, an inclined "draining bracket" fashioned from a joist hanger, and our General Electric oven to remove all the wax and get to the core of the problem—literally. All on a Sunday morning.
The problem was insurmountable: I had fried some internal connections on both transformers when I overheated the terminals with my desoldering tool. I hung my head in shame—and then, on Monday morning, threw myself on the mercy of Mike Grubb and Randy Stringer of QS&D, who have refurbished more Quads than any other two people I know. The next day, vintage trannies from an unrestorable pair of ESLs were on their way to me.
NEXT: Page 2 »
|
| |||||||||
- Log in or register to post comments


| Loudspeakers Amplification Digital Sources | Analog Sources Accessories Featured | Music Columns Retired Columns | Show Reports | Features Latest News Community | Resources Subscriptions |
 © 2024 Stereophile
AVTech Media Americas Inc., USA
All rights reserved