| Columns Retired Columns & Blogs |
Flatline Design 175 loudspeaker Page 2
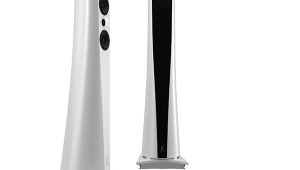
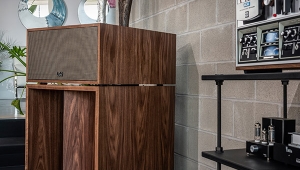
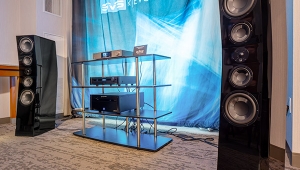
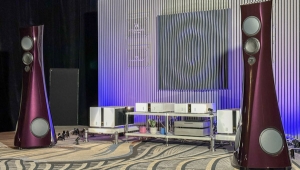
Just visible through the black grille cloth is the star of this system: the pleated-aluminum tweeter/midrange ribbon, 69" tall and about 5/8" wide, is suspended within a magnetic field emanating from 30 lbs of ceramic magnets. The ribbon is lightly clamped at two points along its length by rubberlike wedges, which offer physical support, keep the ribbon oriented within the magnetic field, and damp resonances. The ribbon housing, though open at the back, is partially damped with fibrous material. The open back makes the speaker largely dipolar in radiating characteristics, resulting in an open, spacious sound.
The ribbon is driven evenly over its entire area, and there's no dead weight in the diaphragms: no magnets, voice-coils, laminated materials, or relatively heavy diaphragms. Due to their ultra-low mass, the response time is virtually instantaneous—close to the theoretical ideal of moving air alone. As a result, dynamics within the range of the ribbon and the ability to produce delicate detail are inherently superior. These ribbons emit no spittiness, silvery coloration, sibilance, or telltale metallic sound. This is one of the best incarnations of ribbon technology yet.
Finally, the heavy metal T-bar speaker stands, supplied by Sound Anchors, have three adjustable spikes which penetrate the carpet. (The spikes are required: without them, the speaker is unstable.) Bolting the stands to the base of the speaker cabinet with the supplied hardware is easy. The ribbon housing is then dropped onto a bracket at the top of the assembly, and two bolts at the bottom of the housing are tightened down to the T-bar base.
Placement & matching components
Speakers with narrow fronts, such as the 175, allow much more space between the outside of the speaker and the side walls of the room. The space lengthens the delay time between the direct sound from the speaker drivers and the reflections from the side-wall boundaries reaching your ears. That, in turn, helps the brain separate the direct from the reflected sound, and results in sharper instrumental placement and less muddled sound. This is why minimonitors are able to image so well. For example, in my 12.5'-wide room, the 175s can be separated 6', measured from the inner edges, and still get a speaker-to-side-wall distance of just over 3' measured from the ribbon—the absolute minimum for side-wall standoff.
By contrast, a wide-panel speaker, such as an Apogee or Magnepan, will demand a wider room, eating up as much as an additional 20" of (sonically) precious space. So, the 175 starts with the potential for flexible room placement and superior soundstage performance.
I began with the 175s in roughly the position I normally use for my Mirage M1si speakers: 36" from the side walls, measured from the ribbon, and 77" out from the rear wall, measured from the rear of the ribbon housing. In that position, the stage was only as wide as the ribbons and as deep as the rear wall in the center, but was slightly truncated so that the sound never really extended to the corners of the room. This may be due to the fact that the back of the cabinet projects well behind and outside the ribbon, and doesn't allow effective high-frequency dispersion to the corners. The center image, front and rear, was extremely solid—as good as I've ever heard. There was no need to toe-in the speakers to cure any hole in the middle.
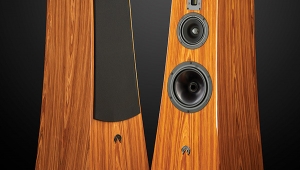
A sound-absorbing baffle placed at the outside of the cabinet at the height of the 5" driver made the sound seem cleaner, demonstrating that the speaker wanted still more room to the outside, that I needed more delay time between the direct and reflected sounds. Experimentation with the baffle also told me that the 5" driver contributes significantly to the imaging of the system. Because I wanted a wider stage, front and rear, and since the stage width was limited to the distance between the ribbons in my room, I decided to separate the speakers by 8'.
This worked beautifully, expanding the orchestral image laterally at the front and rear while not sacrificing the integrity of the center image. I added enough toe-in for the back of the ribbon to "see" the rear corners of the room. That also worked well, turning the outlines of the stage from a truncated pyramid into the desired rectangular shape. The toe-in also lessened the 5" driver's interaction with the walls. Were these speakers to remain permanently in my room, I would place sound-absorbing baffles to the outside of the 5" drivers to optimize imaging. Users with larger rooms shouldn't have to do that. Flatline also mentions the possibility of placing the speakers along the long wall to give the same large-room effect for imaging purposes, but that wasn't possible in my abode.
I still needed to do some work. Placed 77" from the wall behind them, the speakers had a deep stage but sounded lean. Using Stereophile's Test CD 2—avoiding frequency extremes, and referencing the 1/3-octave test tones to pink noise—I measured the bass frequencies between 160 and 40Hz as being down an average of 2.3dB, while the treble range from 2.5 to 10kHz was up an average of 1.6dB. That 4dB spread between the treble and the bass rendered many a bass-heavy pop recording wonderfully transparent; but, as you can imagine, there was little body in better-balanced classical recordings.
I then moved the speakers back toward the rear of the room, so the walls could do some bass reinforcement. With the back of the cabinet just 44" from the rear wall and 24" from the side walls, the averages narrowed to a very respectable –0.175dB for the bass range, and +0.825dB for the treble—a 1dB spread. The midrange average was +0.825dB. These averages are valid for judging overall balance, but with each change in position, every speaker will have dips and spikes in frequency response. Adjustments in placement can minimize the worst of them. Get yourself the Stereophile Test CD 2 and a Radio Shack sound-pressure–level meter—they could teach you a lot about your room and your speakers.
NEXT: Page 3 »
|
| |||||||||
- Log in or register to post comments


| Loudspeakers Amplification Digital Sources | Analog Sources Accessories Featured | Music Columns Retired Columns | Show Reports | Features Latest News Community | Resources Subscriptions |
 © 2024 Stereophile
AVTech Media Americas Inc., USA
All rights reserved